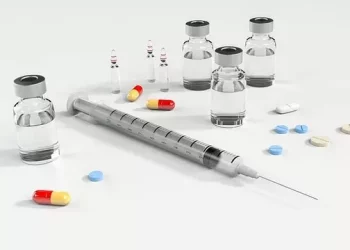
Blood glucose testing is one of the most essential diagnostic tools used in medical practice, particularly in the management of diabetes. This test measures the concentration of glucose in the blood and provides valuable insight into a person’s metabolic state, helping healthcare professionals assess conditions such as diabetes, hypoglycemia, and hyperglycemia. Performing an accurate and reliable glucose test in a laboratory setting requires proper preparation, technique, and interpretation of results.
In this article, we will discuss the various methods used for glucose testing in the lab, the step-by-step process involved, and the factors that influence the accuracy of the test. Understanding how to perform a glucose test correctly is crucial for ensuring that the results are accurate and clinically meaningful.
Types of Glucose Tests Used in Laboratories
Before diving into the specific steps of performing a glucose test, it is essential to understand the different types of glucose tests commonly used in laboratories. These tests vary in terms of their purpose, methodology, and the patient’s preparation.
Fasting Blood Glucose Test
The fasting blood glucose (FBG) test is one of the most commonly used tests to diagnose diabetes and prediabetes. It measures the glucose level in the blood after the patient has fasted for at least 8 hours. This test is useful in detecting chronic high blood sugar levels, often indicative of diabetes.
Oral Glucose Tolerance Test (OGTT)
The oral glucose tolerance test is a more complex test used to diagnose diabetes, especially gestational diabetes. It measures how well the body processes glucose over a specific period. The test involves fasting overnight, followed by drinking a glucose solution, and then taking blood samples at set intervals (typically after 1 hour, 2 hours, and sometimes 3 hours). The OGTT is used to assess the body’s ability to clear glucose from the blood.
Random Blood Glucose Test
The random blood glucose test can be performed at any time of day, regardless of food intake. It measures the glucose level in the blood at the time of testing. This test is often used to diagnose diabetes in symptomatic individuals, as high blood glucose levels are a common sign of the condition.
Hemoglobin A1c Test (HbA1c)
The HbA1c test measures the average blood glucose level over the past 2-3 months. This test provides an overall picture of blood glucose control and is often used for diabetes management. Although it is not a direct glucose test, it is widely used in conjunction with other glucose tests for a comprehensive assessment of a patient’s glucose levels.
Continuous Glucose Monitoring (CGM)
Though not a traditional lab test, continuous glucose monitoring provides real-time measurements of glucose levels throughout the day and night. CGM is often used for patients with diabetes to monitor fluctuations in glucose levels. While CGM devices are more commonly used in outpatient settings, laboratory analysis of CGM data may also be done to track trends and make adjustments to treatment.
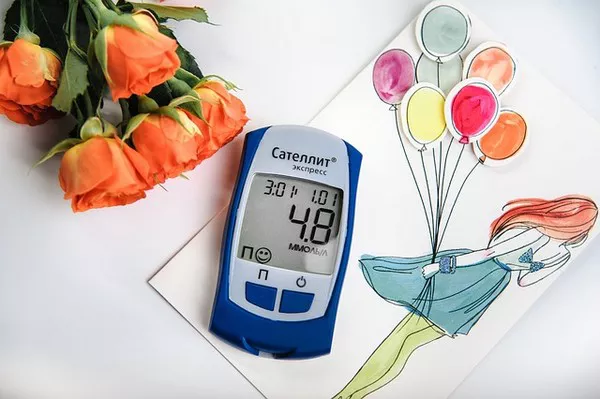
Point-of-Care Blood Glucose Testing
In addition to laboratory-based testing, point-of-care glucose testing is done using portable devices, allowing for rapid results outside of the lab setting. These tests, such as fingerstick glucose tests, provide immediate glucose measurements and are useful for patients who need regular monitoring, particularly those with diabetes.
Step-by-Step Guide to Performing a Glucose Test in the Laboratory
Performing a glucose test in the lab involves several key steps, from patient preparation to sample collection, and finally, the analysis and interpretation of results. Below is a step-by-step guide on how to carry out a standard glucose test in a clinical laboratory.
1. Patient Preparation
Proper patient preparation is crucial to obtaining accurate glucose test results. Depending on the type of glucose test being performed, specific instructions must be given to the patient to ensure the integrity of the sample.
Fasting for 8-12 Hours
For tests such as the fasting blood glucose test and oral glucose tolerance test, the patient must fast for 8-12 hours prior to the test. This means no food or drink, except water, is allowed during this period. Fasting ensures that the glucose levels measured are not affected by recent food intake, which can temporarily elevate blood glucose.
Avoiding Certain Medications
Some medications can affect blood glucose levels and may need to be paused before the test. For instance, corticosteroids, diuretics, and certain antipsychotic medications can elevate blood glucose. Patients should consult with their healthcare provider to determine whether they need to temporarily discontinue these medications before the test.
Patient Consent and Education
It is important to educate the patient about the glucose test procedure and obtain informed consent before proceeding. This includes explaining the purpose of the test, the expected duration, and any potential discomfort or risks involved.
2. Sample Collection
The next step is to collect a blood sample. The method used for blood collection depends on the type of glucose test being performed.
Venous Blood Draw (for Fasting and OGTT)
For most laboratory glucose tests, a venous blood sample is required. The procedure involves using a needle and syringe or vacutainer system to draw blood from a vein, usually in the arm. The blood sample is collected in a tube containing an anticoagulant or preservative, depending on the test being performed.
Disinfecting the Skin: Before inserting the needle, the technician disinfects the area with alcohol or iodine to prevent contamination.
Drawing Blood: A needle is inserted into a vein, and blood is drawn into the collection tube. The patient may experience minor discomfort or a brief sensation of pressure.
Labeling the Sample: It is essential to label the sample correctly with the patient’s information, test type, and time of collection to avoid any mix-up.
Fingerstick Blood Sample (for Point-of-Care Testing)
For point-of-care glucose testing, a smaller amount of blood is often collected through a fingerstick. This method is less invasive and provides quicker results. The process involves:
Cleaning the Finger: The technician cleans the fingertip with an alcohol swab.
Pricking the Finger: A small lancet is used to prick the fingertip, and a droplet of blood is collected.
Analyzing the Sample: The blood is placed on a glucose test strip, which is inserted into a glucose meter to provide a reading.
3. Glucose Measurement Methods
Once the blood sample is collected, it needs to be analyzed. There are various methods for measuring blood glucose levels, and the choice of method depends on the laboratory equipment available.
Enzymatic Assay Method
The most common method for glucose testing in laboratories is the enzymatic assay method. This method uses enzymes such as glucose oxidase or hexokinase to catalyze reactions that produce a measurable signal, usually colorimetric or electrochemical, corresponding to the glucose concentration.
Glucose Oxidase Method: Glucose is oxidized by glucose oxidase in the presence of oxygen to produce hydrogen peroxide. The amount of hydrogen peroxide produced is proportional to the glucose concentration.
Hexokinase Method: This method involves the phosphorylation of glucose by hexokinase, followed by measurement of the NADPH produced in the reaction. The more NADPH produced, the higher the glucose concentration.
Colorimetric Method
In some labs, a colorimetric method may be used, where the glucose in the blood reacts with a reagent to produce a color change. The intensity of the color is measured using a spectrophotometer, and the glucose concentration is calculated.
Electrochemical Method
Electrochemical methods use glucose sensors that measure the current produced when glucose interacts with electrodes. These sensors are often used in point-of-care devices, but they can also be employed in laboratory settings for faster testing.
Automated Blood Glucose Analyzers
Most modern laboratories use automated analyzers to perform glucose tests. These devices can quickly process a large number of samples with minimal human intervention. The blood sample is added to a reagent and placed into the analyzer, which measures glucose levels and provides the results in a short amount of time.
4. Results Interpretation
After the glucose level is measured, the results are analyzed and interpreted based on established reference ranges.
Normal Glucose Levels
Fasting Blood Glucose: Typically, a fasting blood glucose level between 70 and 99 mg/dL is considered normal. Levels above 100 mg/dL but below 126 mg/dL may indicate prediabetes, while levels of 126 mg/dL or higher are diagnostic for diabetes.
Oral Glucose Tolerance Test (OGTT): Normal blood glucose levels should be below 140 mg/dL two hours after drinking the glucose solution. A reading between 140 and 199 mg/dL suggests impaired glucose tolerance, while levels of 200 mg/dL or higher indicate diabetes.
Abnormal Results
Abnormal results may require further testing, including additional blood glucose tests or HbA1c analysis. A healthcare provider will typically assess the patient’s symptoms, medical history, and other risk factors to make a diagnosis.
5. Post-Test Procedures
After the test, the laboratory results are communicated to the healthcare provider, who will discuss the findings with the patient. If the glucose levels indicate a condition like diabetes or prediabetes, the patient may be referred for further evaluation and treatment.
Conclusion
Blood glucose testing is a critical tool in diagnosing and managing diabetes and other metabolic conditions. Performing these tests accurately in the laboratory requires careful preparation, precise sample collection, and proper analytical techniques. By following the correct procedures and interpreting the results appropriately, healthcare providers can ensure that patients receive the right diagnosis and the best possible care.
Related topics:
What Can Raise Blood Sugar Levels