Glucose meters, often referred to as blood glucose monitors, are essential tools for individuals managing diabetes or monitoring their blood sugar levels. These compact devices provide quick and accurate readings of blood glucose levels, enabling users to make informed decisions about their diet, medication, and lifestyle. But how exactly do glucose meters work? This article delves into the science behind these devices, explaining their mechanisms, components, and the technology that makes them indispensable for blood sugar management.
The Basic Components of a Glucose Meter
The Test Strip
At the heart of every glucose meter’s functionality lies the test strip. These thin, often disposable strips are designed with precision and are engineered to interact chemically with the glucose present in a blood sample. They are typically made of a porous material that facilitates the rapid absorption of blood. Each strip contains specific enzymes, most commonly glucose oxidase or glucose dehydrogenase, which play a pivotal role in the measurement process. When a drop of blood is applied to the test strip, the enzymes react with the glucose molecules.
For example, glucose oxidase catalyzes the oxidation of glucose, converting it into gluconic acid and hydrogen peroxide. This chemical reaction is the foundation upon which the meter will later quantify the glucose level. The quality and integrity of the test strip are of utmost importance, as any damage or degradation can lead to inaccurate readings. Manufacturers go to great lengths to ensure the strips are stored and packaged in a way that preserves their reactivity, often including desiccants to prevent moisture absorption that could otherwise interfere with the enzymatic reactions.
The Meter Itself
The glucose meter is the brains of the operation. It is a compact, handheld device that houses a complex array of electronic components. One of the key elements is the electrochemical sensor. This sensor is connected to the test strip and is designed to detect the byproducts of the enzymatic reaction occurring on the strip. In the case of the glucose oxidase reaction mentioned earlier, the sensor picks up the hydrogen peroxide generated. The meter then measures the electrical current produced as a result of this reaction.
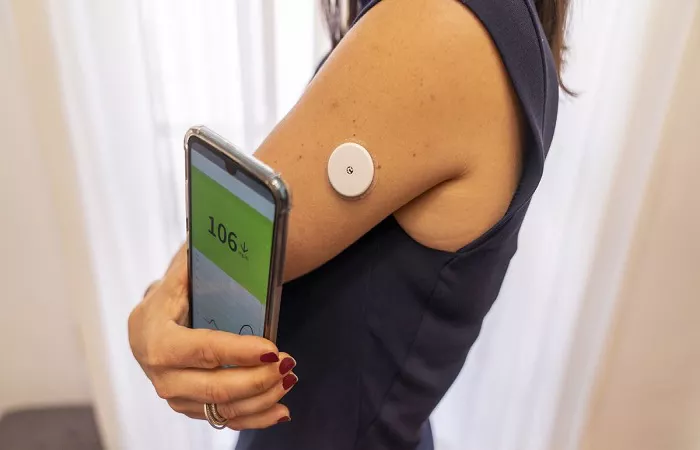
The strength of the current is directly proportional to the concentration of glucose in the blood sample. The meter also features a display screen, usually an LCD, which presents the glucose reading in a clear, easy-to-read format. Additionally, it has buttons for various functions such as turning the device on and off, scrolling through previous readings, and setting the date and time. Some advanced meters even have memory capabilities that can store weeks or months of glucose data, allowing patients and healthcare providers to track trends over time.
The Testing Process Step by Step
Preparation
Before using a glucose meter, proper preparation is essential. Patients must first wash their hands thoroughly with soap and water to remove any contaminants that could potentially affect the accuracy of the reading. This is because substances like food residue or certain lotions on the skin can interfere with the chemical reactions on the test strip. Once the hands are clean, the patient should dry them completely. Next, the glucose meter needs to be turned on and allowed to initialize. This process ensures that all the internal components are ready to function correctly. Some meters may require the insertion of a new, properly coded test strip at this stage. The coding is important as it calibrates the meter to work accurately with that particular batch of test strips, compensating for any slight manufacturing variations.
Obtaining the Blood Sample
The most common method of obtaining a blood sample for a glucose meter is through a finger prick. Special lancets are used for this purpose. These lancets are designed to create a small, controlled puncture in the fingertip, allowing a tiny drop of blood to be expressed. When using a lancet, patients need to follow the instructions carefully to ensure the correct depth of puncture. Too shallow a puncture may not yield enough blood, while too deep can cause unnecessary pain. Once the finger is pricked, a gentle squeeze may be applied to the fingertip to encourage the blood to form a drop large enough to cover the test strip’s sampling area. It’s crucial to avoid excessive squeezing, as this can introduce interstitial fluid into the sample, diluting the blood and leading to inaccurate readings.
Applying the Blood to the Test Strip
With the blood drop ready, it must be quickly and accurately applied to the test strip. The test strip usually has a designated area, often marked with a symbol or color-coded, where the blood should be placed. Patients should hold the test strip in a way that allows the blood to be absorbed evenly. As soon as the blood touches the strip, the enzymatic reaction begins. It’s important to note that the meter has a limited window of time, typically a few seconds, during which it can accurately detect and measure the reaction. If the blood is applied too slowly or not in the correct manner, the meter may not be able to provide a reliable reading.
Reading and Recording the Result
Once the blood is applied to the test strip and the meter detects the reaction, it takes only a matter of seconds for the glucose reading to appear on the display screen. Patients should carefully note this reading, as it provides crucial information about their current blood sugar status. Many meters also have the option to record the reading automatically in their internal memory. This feature is invaluable for tracking blood sugar trends over time. After recording the result, patients can take appropriate actions based on the reading. If the blood sugar level is too high, they may need to adjust their diet, increase physical activity, or administer insulin as prescribed. Conversely, if the level is too low, consuming a small amount of fast-acting carbohydrate is usually recommended.
Ensuring Accuracy and Calibration
Quality Control Measures by Manufacturers
Glucose meter manufacturers implement stringent quality control measures to ensure the accuracy of their products. During the manufacturing process, each batch of test strips and meters undergoes rigorous testing. This includes calibrating the meters against known glucose concentrations in a laboratory setting. The enzymes used in the test strips are carefully selected and formulated to provide consistent and reliable reactions. Manufacturers also conduct stability studies to determine the shelf life of both the test strips and the meters. This ensures that even after months of storage, the devices will continue to function accurately. Additionally, they provide detailed instructions for use and storage to minimize the potential for user error.
User Responsibilities for Accuracy
While manufacturers do their part, patients also have significant responsibilities in ensuring accurate glucose readings. As mentioned earlier, proper handwashing and correct blood sampling techniques are crucial. Patients should also store their glucose meters and test strips according to the manufacturer’s instructions. Extreme temperatures and humidity can affect the performance of both. Regularly checking the meter’s battery life is another important aspect, as a low battery can lead to inaccurate readings. Some meters have built-in self-test functions that patients can use to periodically verify the device’s accuracy. If a meter consistently provides readings that seem inconsistent with how the patient is feeling or other symptoms, it’s important to contact a healthcare provider or the meter manufacturer for further investigation.
Conclusion
Glucose meters are indispensable tools for managing blood sugar levels, particularly for individuals with diabetes. By understanding how these devices work, users can ensure accurate readings and make informed decisions about their health. From the electrochemical reactions on test strips to the advanced features of modern meters, the technology behind glucose monitoring continues to evolve, offering greater convenience and reliability. Whether you’re new to glucose monitoring or a seasoned user, mastering the use of a glucose meter is a vital step toward achieving optimal blood sugar control and overall well-being.