In the realm of self – healthcare, home blood sugar testing has emerged as a powerful tool, empowering individuals, especially those with diabetes, to take control of their metabolic health. This convenient and accessible practice allows for real – time monitoring of blood glucose levels, enabling timely adjustments to diet, exercise, and medication regimens. Unlike clinical laboratory tests, home blood sugar testing provides immediate results, offering a snapshot of one’s glycemic status throughout the day. With the right knowledge and proper technique, anyone can perform these tests accurately at home.
Essential Equipment for Home Blood Sugar Testing
Glucometers: The Heart of Home Monitoring
Selecting the Right Glucometer When choosing a glucometer, several factors should be considered. Accuracy is of utmost importance, as reliable results are essential for making informed decisions about health management. It is advisable to select a glucometer that has been approved by relevant medical authorities and has undergone rigorous testing for accuracy. Ease of use is another crucial factor, especially for individuals who may be new to home blood sugar testing or have limited dexterity. The device should have a simple interface and clear instructions. Additionally, the cost of the glucometer and its associated test strips should be taken into account, as these can be a significant ongoing expense.
Test Strips: The Key to Accurate Measurements
Function and Compatibility Test strips are an integral part of home blood sugar testing. These small strips contain chemicals that react with the glucose in the blood sample. When a drop of blood is applied to the test strip, a chemical reaction occurs, generating a signal that the glucometer can detect and convert into a blood glucose reading. It is essential to use test strips that are specifically designed for the chosen glucometer, as different models may require different types of strips. Using incompatible test strips can lead to inaccurate results, which can have serious implications for health management.
Storage and Handling Proper storage of test strips is crucial for maintaining their effectiveness. Test strips should be stored in a cool, dry place, away from direct sunlight and moisture. They should also be kept in their original container, which helps protect them from contamination. It is important to check the expiration date of the test strips before use, as expired strips may not provide accurate results. When handling test strips, it is recommended to wash hands thoroughly and dry them completely to prevent any contaminants from affecting the sample.
Step – by – Step Guide to Home Blood Sugar Testing
Preparation
Wash and Dry Hands Before starting the test, it is essential to wash hands thoroughly with soap and warm water. This helps remove any dirt, debris, or substances that could potentially contaminate the blood sample. After washing, hands should be dried completely using a clean towel or tissue. Wet hands can affect the accuracy of the test by diluting the blood sample or causing the blood to spread unevenly on the test strip.
Assemble the Equipment Gather all the necessary equipment, including the glucometer, test strips, lancet device, lancets, and alcohol swabs. Make sure the glucometer has fresh batteries and is turned on. Insert a test strip into the glucometer according to the manufacturer’s instructions. Some glucometers may require the test strip to be inserted before turning on the device, while others may have a specific sequence for operation.
Pricking the Finger
Select the Pricking Site The most common site for obtaining a blood sample is the fingertip. However, other sites such as the palm, forearm, or upper arm can also be used, depending on the type of glucometer and personal preference. When choosing a fingertip, it is advisable to select the side of the finger rather than the center, as this area has fewer nerve endings and is less painful. Avoid pricking the same spot repeatedly, as this can cause soreness and increase the risk of infection.
Use the Lancet Device Load a lancet into the lancet device according to the manufacturer’s instructions. Adjust the depth setting of the lancet device if necessary. Hold the finger firmly and use the lancet device to prick the skin. The lancet should penetrate the skin quickly and smoothly. Some lancet devices have a spring – loaded mechanism that ensures a consistent and painless prick.
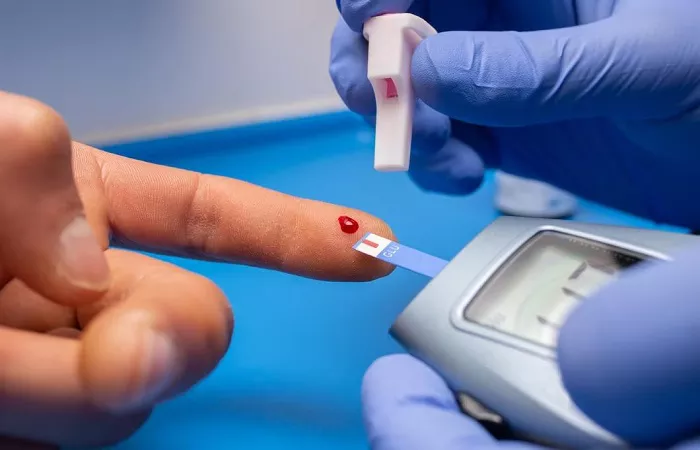
Obtaining the Blood Sample
Squeeze the Finger Gently After pricking the finger, gently squeeze the base of the finger to encourage the formation of a drop of blood. Avoid squeezing too hard, as this can cause the blood to be diluted with tissue fluid, leading to inaccurate results. A single, large drop of blood is usually sufficient for most glucometers. If the blood does not form a drop on its own, gently massage the finger from the base towards the tip.
Apply the Blood to the Test Strip Hold the test strip close to the drop of blood and allow the blood to be drawn into the sample well by capillary action. Make sure the test strip is completely filled with blood, as an insufficient sample can result in an error message or inaccurate reading. Avoid touching the test strip with the finger or any other object after applying the blood, as this can contaminate the sample.
Reading the Results
Wait for the Glucometer to Process Once the blood sample has been applied to the test strip, the glucometer will begin to process the sample. The time required for the glucometer to display the result can vary depending on the model, but it usually takes between 5 – 30 seconds. During this time, it is important to keep the glucometer and test strip stable and avoid any movement that could disrupt the reading.
Record the Results Once the result is displayed on the glucometer, write it down in a blood glucose logbook or use a mobile app to record the reading. Make sure to include the date, time, and any relevant information such as the time of the last meal, exercise, or medication taken. Recording the results regularly helps track blood glucose trends over time and provides valuable information for healthcare providers.
Best Practices and Considerations
Frequency of Testing
The frequency of home blood sugar testing depends on several factors, including the type of diabetes, treatment plan, and individual health goals. For individuals with type 1 diabetes, frequent testing is often recommended, typically before and after meals, at bedtime, and before and after exercise. This helps them adjust their insulin doses and manage their blood sugar levels throughout the day. Individuals with type 2 diabetes may also need to test regularly, especially if they are taking insulin or other medications that can affect blood sugar levels. However, the frequency of testing may be less frequent compared to those with type 1 diabetes. It is important to consult with a healthcare provider to determine the appropriate testing schedule.
Interpreting the Results
Understanding how to interpret blood sugar test results is essential for effective self – management. Normal fasting blood glucose levels typically range from 70 – 99 mg/dL (3.9 – 5.5 mmol/L), while two – hour post – meal levels should be less than 140 mg/dL (7.8 mmol/L). However, target blood glucose ranges may vary depending on individual factors such as age, overall health, and the presence of other medical conditions. It is important to discuss target ranges with a healthcare provider and use the test results as a guide for making adjustments to diet, exercise, and medication. If the results are consistently outside the target range, it is important to contact a healthcare provider for further evaluation and possible changes to the treatment plan.
Maintaining Equipment
Regular maintenance of the glucometer and other equipment is important for ensuring accurate results. Glucometers should be cleaned regularly according to the manufacturer’s instructions to remove any blood or debris that may accumulate on the device. Test strips should be stored properly and used before their expiration date. Lancet devices should also be cleaned and disinfected regularly to prevent the spread of infection. If the glucometer is not working properly or the results seem inaccurate, it is important to contact the manufacturer or a healthcare provider for assistance.
Conclusion
home blood sugar testing is a valuable skill that can significantly contribute to the management of diabetes and overall metabolic health. By understanding the necessary equipment, following the proper testing procedures, and adhering to best practices, individuals can obtain accurate and reliable results at home. Regular home blood sugar testing provides valuable information that can help individuals make informed decisions about their diet, exercise, and medication, ultimately leading to better blood sugar control and improved quality of life.