Managing blood sugar levels is an essential part of living with diabetes. Regular monitoring is crucial to understanding how your body is responding to food, exercise, medication, and stress. With advancements in technology, it’s now easier than ever to check your blood sugar levels at home. Whether you are newly diagnosed or managing long-term diabetes, knowing how and when to check your blood sugar can help you keep your condition under control and make informed decisions about your health.
Why is Blood Sugar Monitoring Important?
For individuals with diabetes, blood sugar levels must be carefully monitored to prevent both high and low blood sugar (hyperglycemia and hypoglycemia). These fluctuations can lead to a host of complications, including nerve damage, heart disease, kidney problems, and vision loss. Monitoring allows you to:
- Track how food, exercise, and medication affect your blood sugar.
- Prevent complications related to poorly controlled blood sugar.
- Make adjustments to your lifestyle or treatment plan if necessary.
- Identify patterns and trends to discuss with your healthcare team.
While blood sugar monitoring is critical, it’s essential to know the right methods and tools to achieve accurate results. In this article, we will explain how you can check your blood sugar at home effectively.
Understanding Blood Sugar Levels
Before learning how to check blood sugar, it’s important to understand what the numbers mean. Blood sugar is measured in milligrams per deciliter (mg/dL) or millimoles per liter (mmol/L), depending on your region.
Normal blood sugar levels: A fasting blood sugar level (measured in the morning, before eating) is typically between 70-100 mg/dL (3.9-5.6 mmol/L). After meals, levels should be below 140 mg/dL (7.8 mmol/L).
Pre-diabetes: A fasting blood sugar level of 100-125 mg/dL (5.6-6.9 mmol/L) suggests pre-diabetes, indicating an increased risk of developing type 2 diabetes.
Diabetes: A fasting blood sugar level of 126 mg/dL (7 mmol/L) or higher on two separate tests confirms a diagnosis of diabetes.
Note: Target blood sugar levels vary from person to person, depending on factors such as age, overall health, and the specific type of diabetes. Always consult your healthcare provider for personalized targets.
Tools for Home Blood Sugar Monitoring
To monitor your blood sugar effectively at home, you need the right tools. There are several devices available, but the most common and widely used are glucose meters and continuous glucose monitors (CGMs). Let’s break down each one:
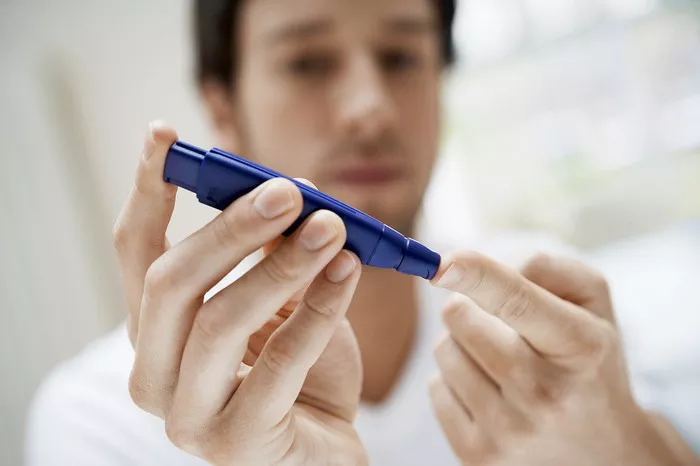
1. Glucose Meters (Blood Glucose Meters)
A glucose meter is a handheld device that measures the amount of glucose in a blood sample. This is the most common method for checking blood sugar at home and provides a quick, accurate reading. The device requires a small drop of blood, typically obtained from a fingertip.
Key Components of a Glucose Meter:
Meter: The device that measures your blood glucose levels.
Test Strips: Small strips that you insert into the meter. You’ll place a drop of blood onto the strip, which is then analyzed by the meter.
Lancet: A small needle or device used to prick your fingertip to obtain the blood sample.
Control Solution: Some meters come with control solutions to test the accuracy of your meter.
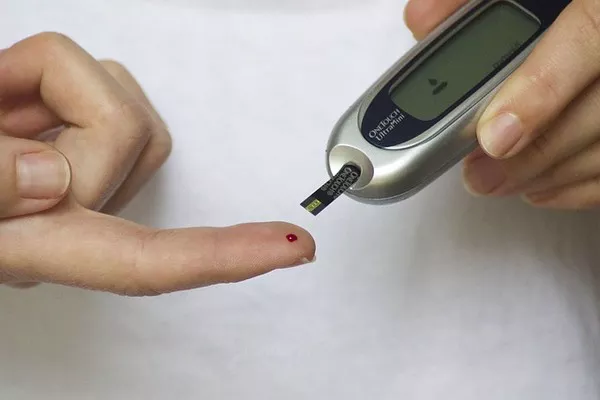
How to Use a Glucose Meter:
Wash your hands: Clean your hands with warm water and soap to ensure no contaminants affect the result.
Insert the test strip: Place a test strip into the glucose meter.
Prepare the lancet: Load a lancet into the lancing device and set the depth for a comfortable yet sufficient prick.
Prick your finger: Choose the side of your fingertip to avoid pain. Press the lancet against the fingertip and press the button to release the needle. A small drop of blood will appear.
Apply the blood: Place the drop of blood on the test strip. The glucose meter will automatically calculate and display your blood sugar level.
Dispose of the strip and lancet: Safely dispose of the used lancet and strip in a proper sharps container.
Tips for Accurate Results:
Use the side of your fingertip: This area has fewer nerve endings and will hurt less.
Avoid squeezing your finger: Squeezing may lead to inaccurate readings by causing interstitial fluid to mix with the blood sample.
Ensure your test strips are within date: Using expired strips can lead to incorrect readings.
Perform regular control tests: Periodically check the accuracy of your glucose meter by using a control solution (if available) to make sure your meter is working properly.
2. Continuous Glucose Monitors (CGMs)
A continuous glucose monitor (CGM) is a small wearable device that continuously measures blood sugar levels throughout the day and night. CGMs use a sensor placed under the skin (usually on the abdomen or arm) to track blood glucose levels in real time. The device sends data to a receiver, smartphone, or insulin pump.
How CGMs Work:
Sensor: The sensor measures the glucose levels in the fluid between your cells (interstitial fluid).
Transmitter: The transmitter sends the glucose data to your receiver or smartphone.
Receiver/Smartphone App: The device that displays the glucose levels, which can be used to monitor trends and patterns.
Advantages of CGMs:
- Continuous monitoring provides real-time data.
- They alert you to dangerous blood sugar levels, especially hypoglycemia.
- You can see trends in your blood sugar and adjust your diet, activity, and medications accordingly.
- They reduce the need for fingerstick testing (though some CGMs still require occasional calibration or fingerstick checks).
How to Use a CGM:
Insert the sensor: The CGM sensor is usually inserted with a small device that places it just under the skin. This is done by your healthcare provider or, in some cases, yourself at home.
Wear the transmitter: The transmitter is attached to the sensor and sends data to your device.
Monitor data: You’ll receive continuous data, allowing you to track your blood sugar levels throughout the day.
Adjust treatment: Based on the readings, you can adjust your insulin dosage, meals, and exercise to keep your blood sugar within target ranges.
Tips for CGM Use:
Sensor calibration: Some CGMs require calibration with a fingerstick test to ensure accuracy. Follow your manufacturer’s instructions carefully.
Wear the sensor correctly: Make sure the sensor is securely attached to your skin and not displaced by clothing or physical activity.
Data review: Regularly review the data with your healthcare provider to adjust your treatment plan.
3. Alternative Sites for Testing
Although fingersticks are the most common method, blood sugar can also be tested from other sites on your body. These include the palm, forearm, and thigh. While using alternative sites can reduce discomfort, it’s important to note that they may not provide the same accurate readings as fingertip testing, especially during rapid changes in blood sugar.
When to Avoid Alternative Sites:
- If your blood sugar is rapidly changing (after meals or exercise), fingertip testing is more reliable.
- If you’re experiencing hypoglycemia (low blood sugar), fingertip testing is the most accurate.
How Often Should You Check Your Blood Sugar?
The frequency of blood sugar monitoring varies from person to person, depending on factors such as the type of diabetes, treatment plan, and individual health needs. However, the following general guidelines may apply:
For Type 1 Diabetes: People with type 1 diabetes typically need to check their blood sugar at least 4-6 times a day, including before and after meals, and sometimes during the night.
For Type 2 Diabetes: If you’re managing your diabetes with insulin, you may need to check your blood sugar at least once a day, typically before meals. Those using oral medications may check less frequently.
For Gestational Diabetes: Women with gestational diabetes often monitor their blood sugar levels 4-5 times a day.
Understanding Your Results and Next Steps
Once you’ve obtained your blood sugar reading, it’s important to understand what it means. Typically, readings should fall within the target range set by your healthcare provider.
High blood sugar: If your reading is higher than your target range, it might indicate that your insulin or medication needs adjustment, or that you’ve consumed too many carbohydrates. Consult your doctor if your levels remain high.
Low blood sugar: If your reading is below your target range, you may be experiencing hypoglycemia. Symptoms include shakiness, dizziness, confusion, and sweating. Treat low blood sugar promptly by consuming a quick source of glucose, such as fruit juice, glucose tablets, or a sugary snack.
Conclusion
Monitoring your blood sugar levels at home is a crucial aspect of managing diabetes and maintaining good health. By using the right tools, whether it’s a glucose meter or continuous glucose monitor, and understanding how and when to check your blood sugar, you can make informed decisions about your diet, exercise, and medication. Regular testing allows for early detection of any imbalances, helping to prevent complications down the road.
Blood sugar monitoring doesn’t need to be complicated or stressful. With the right knowledge and proper technique, you can manage your diabetes confidently and improve your quality of life. Always consult your healthcare provider for personalized advice and recommendations regarding your blood sugar monitoring routine.
Related topics:
Where Can I Get a Continuous Glucose Monitor?
What Should Be the Blood Sugar Level 2 Hours After Lunch?
What’s the Key Parameters for Blood Sugar Monitoring in Diabetes